装机必备
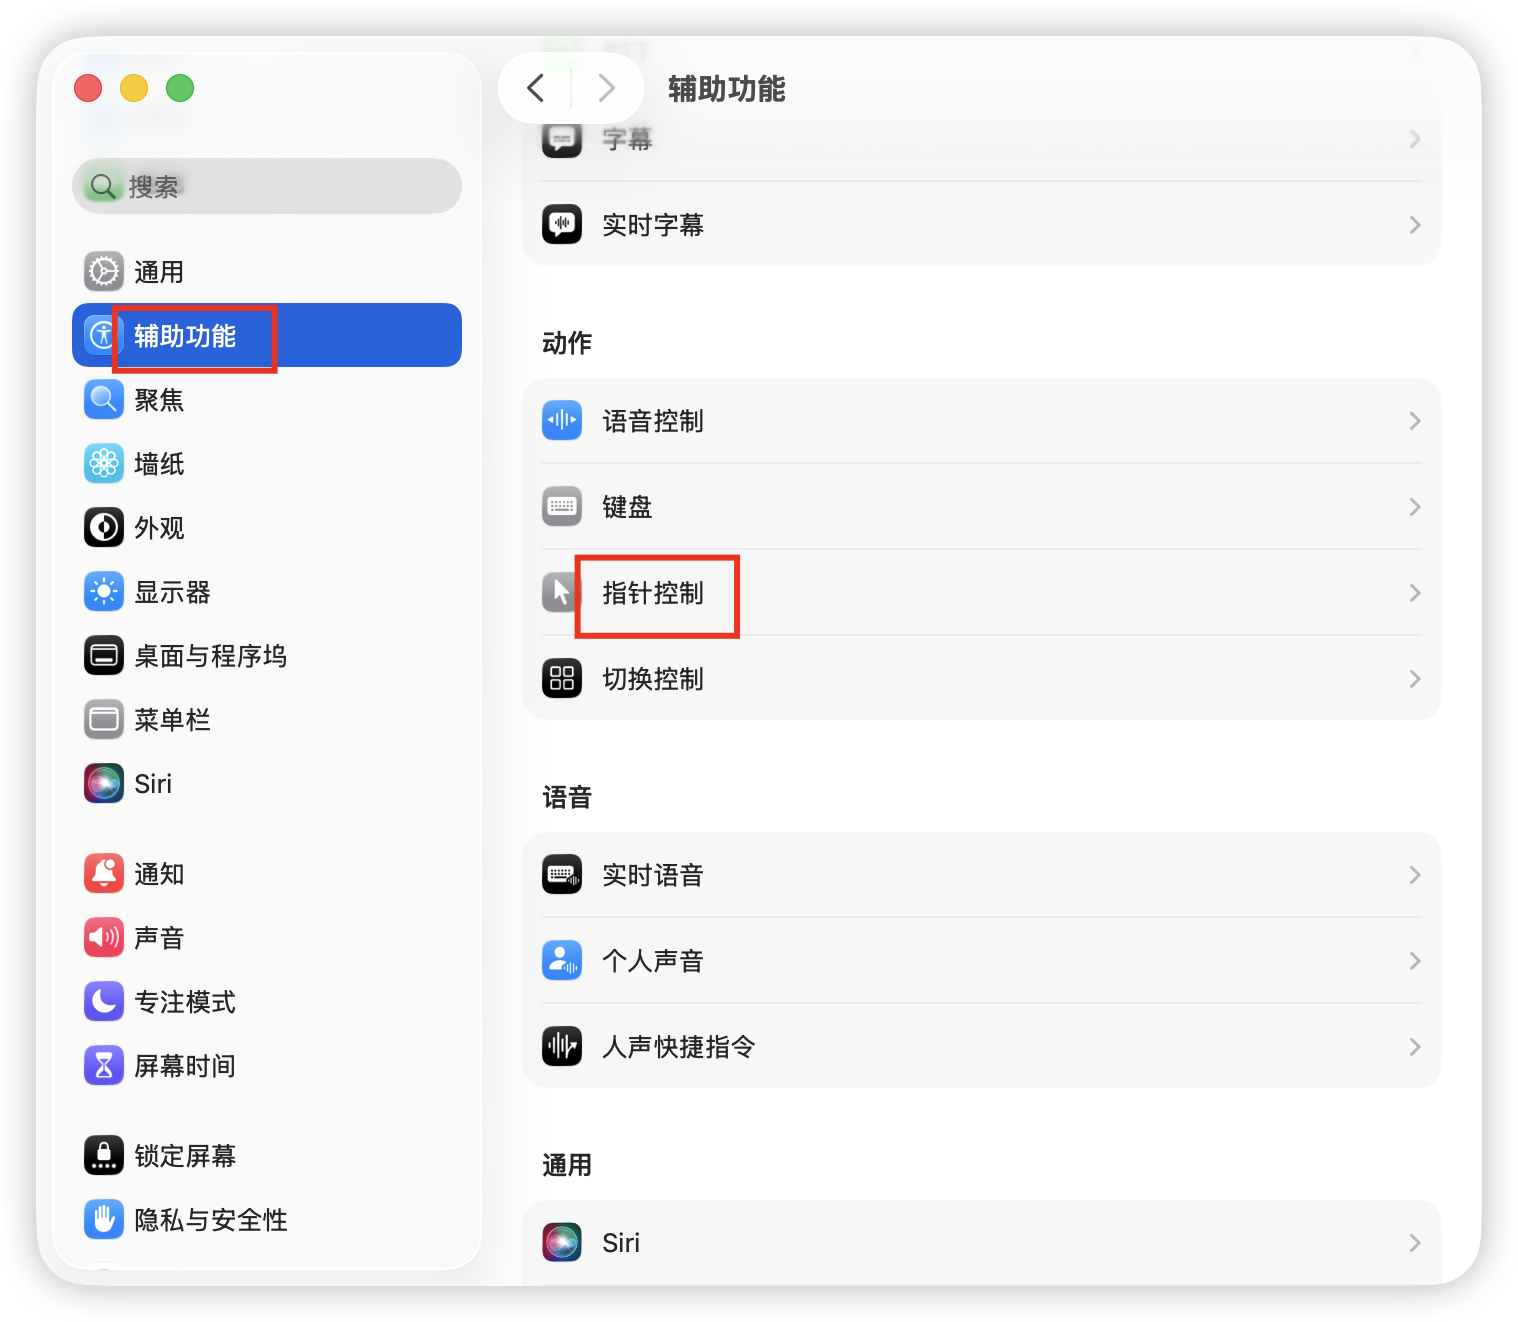
1. 触控板与键盘
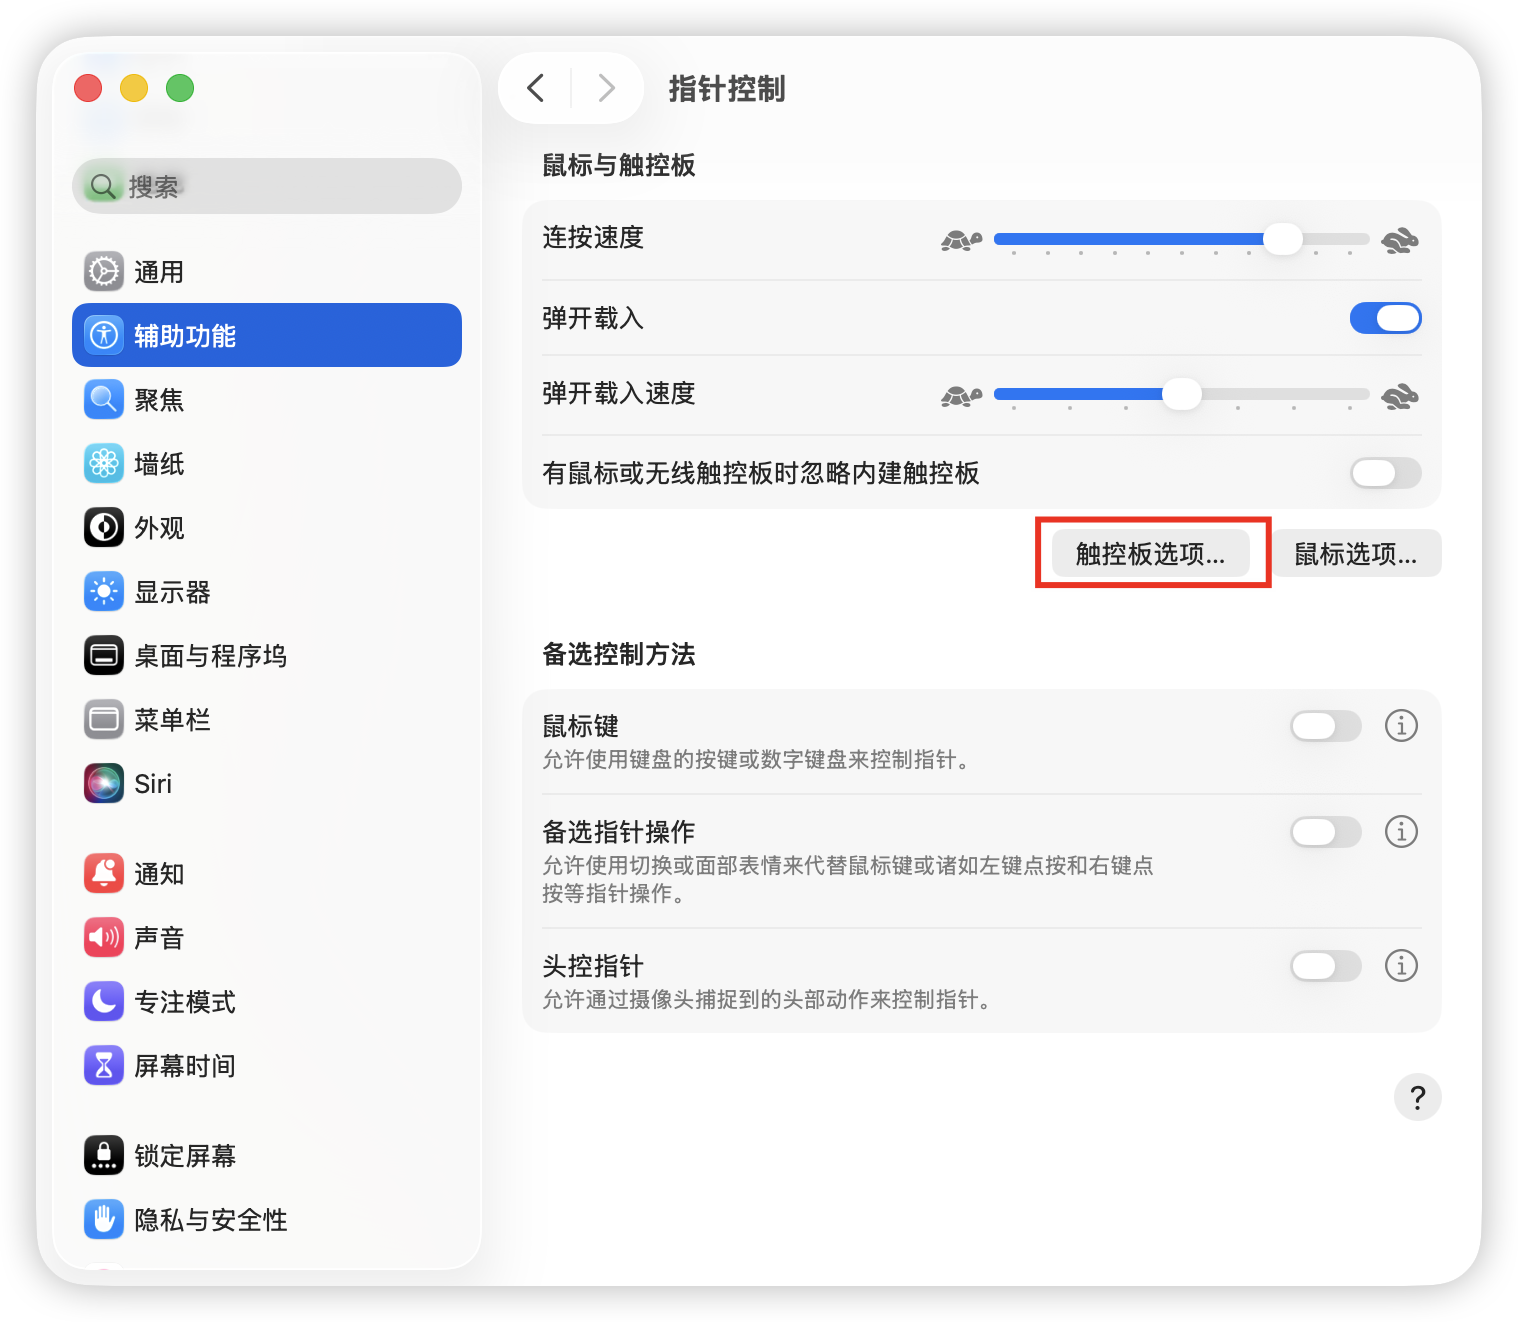
触控板轻按点击

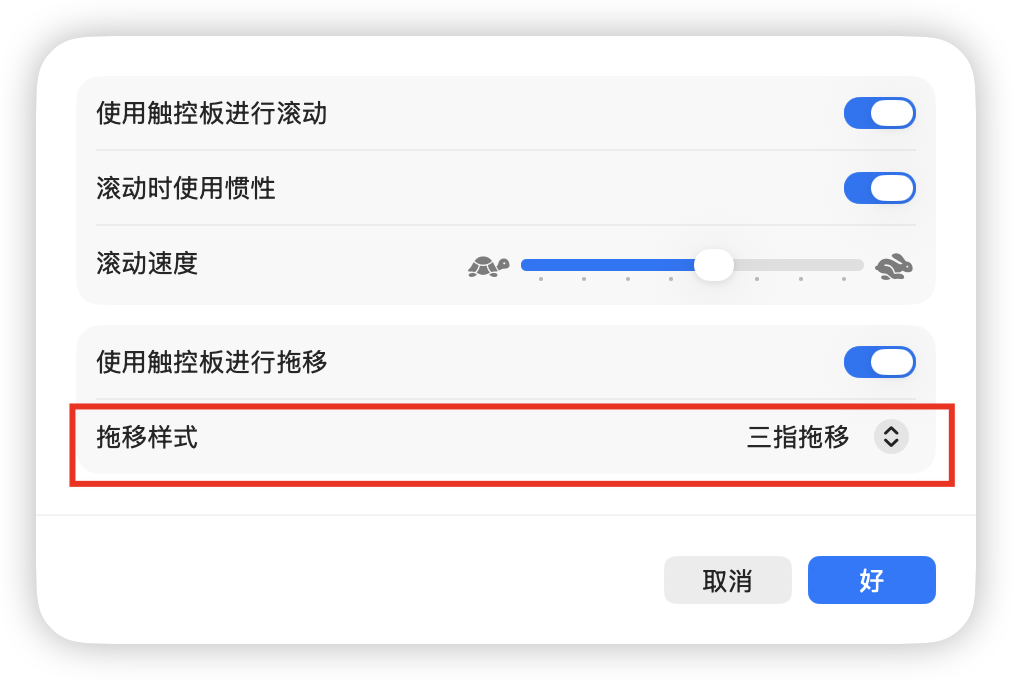
触控板三指拖拽
五笔输入法
清歌输入法
2. 基本软件
iShot截图软件
The Unarchiver解压缩软件
SwitchHosts host文件修改
翻墙软件
Chrome浏览器
VsCode
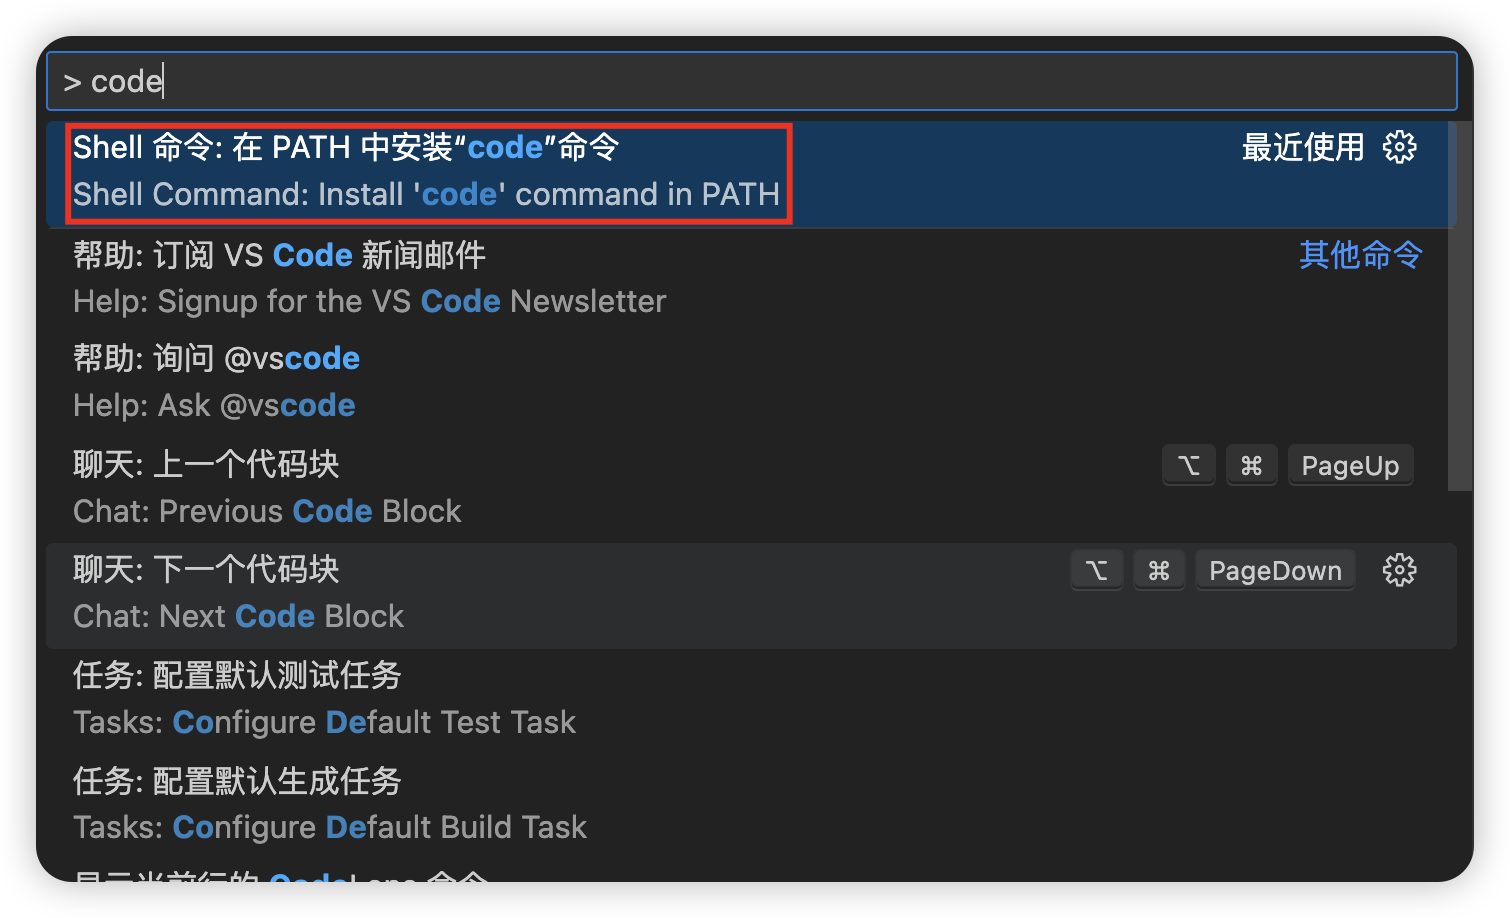
终端支持 code 指令打开vscode
shift + command 搜索code
中文界面
Chinese插件

3. 编程环境搭建
node + nvm
node.js + nvm(node版本管理工具) + npm
# Download and install nvm:
curl -o- https://raw.githubusercontent.com/nvm-sh/nvm/v0.40.3/install.sh | bash

# in lieu of restarting the shell
\. "$HOME/.nvm/nvm.sh"

# Download and install Node.js:
nvm install 24

# Verify the Node.js version:
node -v # Should print "v24.10.0".

# Verify npm version:
npm -v # Should print "11.6.1".
报错:curl: (7) Failed to connect to raw.githubusercontent.com port 443: Connection refused
执行curl -fsSL https://raw.githubusercontent.com/mklement0/n-install/stable/bin/n-install时报错
解决办法:
- 打开 https://www.ipaddress.com/ 输入访问不了的域名
- 查询之后可以获得正确的 IP 地址
- 在本机的 host 文件中添加,建议使用 switchhosts 方便 host 管理
199.232.68.133 raw.githubusercontent.com
node版本管理工具nvm
# 安装指定node版本
nvm install 4.2.2

# 查找远程所有可用版本
nvm ls-remote

# 版本切换
nvm use 4.2.2

# 查找所有可用的已安装版本
nvm ls

# 查看当前版本
nvm current

# 修改default别名,这样每次终端重新打开,default版本就变成你最常用的版本
nvm alias default xxx
- 使用nvm切换到不能的node,对应npm也会变化
- npm变化之后,不同版本的npm安装的全局插件 ,无法共通。比如用npm@10安装的pnpm,npm@11找不到pnpm
- 每次终端重新打开,nvm都会回到 node 的 default版本
nvm一个很重要的作用就是 避免全局安装的权限问题,但是仍然出现EACCES: permission denied问题,是什么原因?
- 首先
EACCES: permission denied报错是指权限不足 - 最常见的原因是:目录所有权被意外修改(最常见)
- 若你曾用sudo安装过全局包(如
sudo npm install -g pnpm),会导致~/.nvm目录或其子目录(如~/.nvm/versions/node/<version>/lib/node_modules)的所有权变为root。后续用普通用户执行npm或pnpm命令时,因无写入权限而报错(EACCES: permission denied)
- 若你曾用sudo安装过全局包(如
sudo chown -R <yourusername> ~/.nvm

open ~/.zshrc

## 确保有以下信息
# nvm环境变量配置
export NVM_DIR="$HOME/.nvm"
[ -s "$NVM_DIR/nvm.sh" ] && \. "$NVM_DIR/nvm.sh"  # 加载nvm
[ -s "$NVM_DIR/bash_completion" ] && \. "$NVM_DIR/bash_completion"  # 加载自动补全

# 重启
source ~/.zshrc


# 检查npm的全局安装路径是否在~/.nvm目录下
# 若输出为/home/<your_username>/.nvm/versions/node/<version>,则说明配置正确。
npm config get prefix
npm + nrm
npm源管理工具nrm
sudo npm install -g nrm

# 查看当前可用源
nrm ls

# 切换到指定源
nrm use xxx

# 新增源
nrm add <registry> <url>

# 删除源
nrm del <registry>

# 测试速度
nrm test <registry>
npm查看新增源
# 查看npm源
npm config get registry

# 设置npm源
npm config set registry https://mirrors.huaweicloud.com/repository/npm/

# 自定义cnpm淘宝源
npm install -g cnpm --registry=https://registry.npmmirror.com
cnpm install xxx
git
git安装
在 Mac 上安装 Git 有多种方式。 最简单的方法是安装 Xcode Command Line Tools。 Mavericks (10.9) 或更高版本的系统中,在 Terminal 里尝试首次运行 'git' 命令即可。
git --version
添加Git SSH密钥
# 检查是否已有SSH密钥
# 如果看到以.pub结尾的文件,如id_rsa.pub,那么您已经有了SSH密钥。如果没有,继续下一步
ls -al ~/.ssh
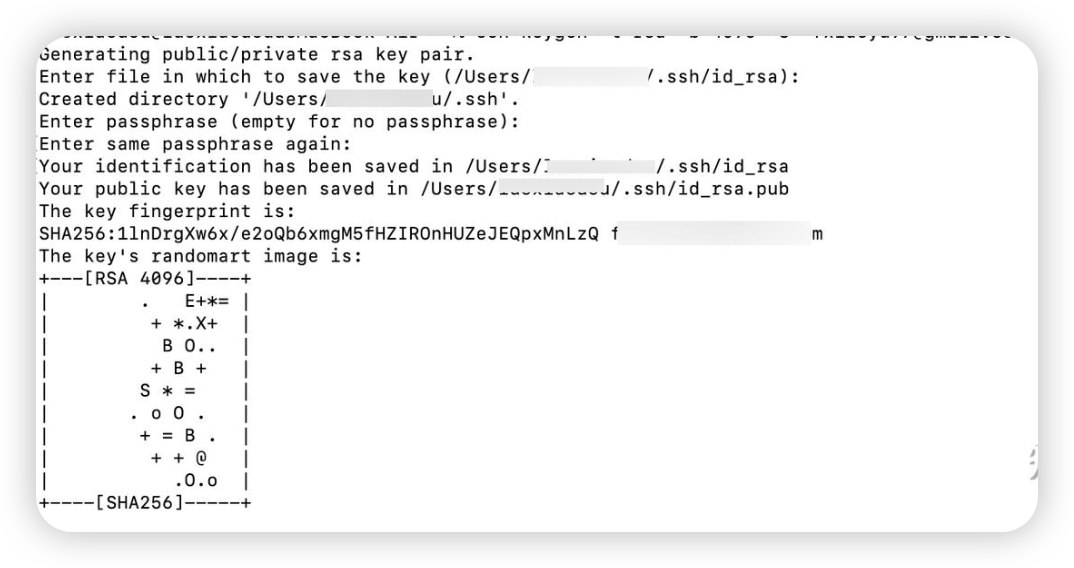
# 生成新的SSH密钥
# -t rsa指定了密钥类型,-b 4096指定了密钥长度,-C后面跟的是一个注释,通常是您的邮箱地址
ssh-keygen -t rsa -b 4096 -C "test@qq.com"
# 将SSH密钥添加到ssh-agent
# 为了让SSH密钥在新的终端会话中持续有效,您需要将它添加到ssh-agent:
eval "$(ssh-agent -s)"

# 然后添加您的私钥到ssh-agent:
ssh-add ~/.ssh/id_rsa
复制公钥到GitHub
cat ~/.ssh/id_rsa.pub
登录到GitHub,进入“Settings”(设置)> “SSH and GPG keys”(SSH和GPG密钥),点击“New SSH key”(新建SSH密钥),粘贴您的公钥内容,并为其设置一个标题。
测试SSH连接
ssh -T git@github.com
如果一切设置正确,您将看到一条消息,表明您已成功认证,但GitHub不提供shell访问。

完成以上步骤后,您的Mac就可以使用SSH方式与GitHub进行通信了。这样,您可以在Git中使用SSH协议来克隆仓库、推送代码等,而不需要输入用户名和密码。
解决git pull特别慢的问题
设置本地代理,端口号依据自己使用的工具情况修改
只对github进行代理,不会影响国内仓库(推荐)# socks5协议,1080端口修改成自己的本地代理端口
git config --global http.https://github.com.proxy socks5://127.0.0.1:xxxx
git config --global https.https://github.com.proxy socks5://127.0.0.1:xxxx
# http协议,1081端口修改成自己的本地代理端口
git config --global http.https://github.com.proxy https://127.0.0.1:xxxx
git config --global https.https://github.com.proxy https://127.0.0.1:xxxx
# socks5协议,1080端口修改成自己的本地代理端口
git config --global http.proxy socks5://127.0.0.1:xxxx
git config --global https.proxy socks5://127.0.0.1:xxxx

# http协议,1081端口修改成自己的本地代理端口
git config --global http.proxy http://127.0.0.1:xxxx
git config --global https.proxy https://127.0.0.1:xxxx
# 取消代理设置
git config --global --unset http.proxy
git config --global --unset https.proxy

# 查看当前代理
git config --global http.proxy
git config --global https.proxy
Homebrew包管理
Homebrew是一款包管理工具,目前支持macOS和Linux系统。主要有四个部分组成: brew、homebrew-core 、homebrew-cask、homebrew-bottles。
# 安装
/bin/bash -c "$(curl -fsSL https://gitee.com/ineo6/homebrew-install/raw/master/install.sh)"

# 卸载
/bin/bash -c "$(curl -fsSL https://gitee.com/ineo6/homebrew-install/raw/master/uninstall.sh)"

# 更新
brew update
如果遇到 command not found brew,请执行下面脚本完成安装或者直接重新打开终端:
eval "$(/opt/homebrew/bin/brew shellenv)"
iTerm2 + Oh My Zsh + The Fuck 打造舒适终端
iTerm2
iTerm2安装,可以设置样式、背景图片等
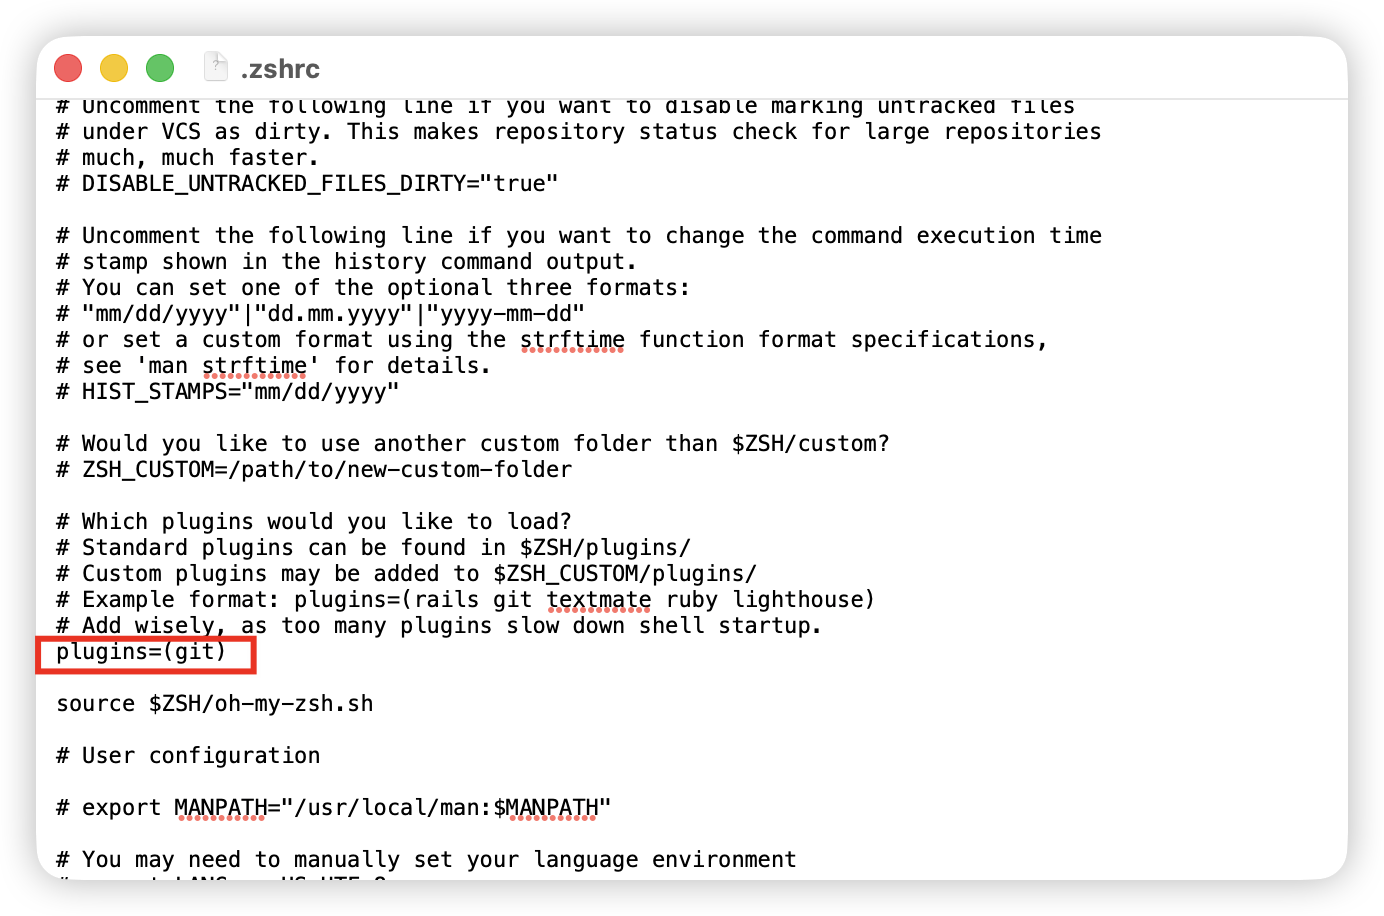
ohmyzsh
oh my zsh自带很多的插件,默认初始内置git插件:提供了许多别名和一些有用的函数
其他常用插件:
- autojump自动跳转到,必须先安装
brew install autojump
oh my zsh还有很多主题
The Fuck
运行上个命令出错了,那么输入
fuck运行之后,会发现能帮我们解决命令不存在的问题、命令错误的问题
# 安装
brew install thefuck
4. VsCode插件
AI工具
- GitHub Copilot/Chat
- Trae AI
- CodeGeeX
- CodeBuddy
- Tabnine
Git工具
- GitLens:提示Git提交记录、分支记录、对比、冲突等
- Git History
语法格式
- Eslint
- Prettier
- Auto Close Tag: 自动关闭Tag
- Auto Rename Tag: 首尾自动更新Tag名称
- npm Intellisense: 在导入语句自动补全npm模块名称
- Color Highlight: 直接展示代码中设置的颜色
- Image Preview: 可以直接在CSS中看到引入的图片预览
- change-case: 大小写、驼峰切换
- Quokka.js:实时执行JavaScript代码(做快速的demo很有用)。
- React Native Tools:代码提示、Debugging、集成RN的命令
- React Snippets(有AI,现在可能用处不大)
- Vue Snippets(有AI,现在可能用处不大)
- Vetur
数据库工具
- MongoDB for VS Code
主题类工具
- vscode-icons: 文件夹、文件图标
- Dracula Theme Official
其它
- CodeSnap:代码截图
- TODO Highlight: TODO高亮记号
自定义代码片段
自定义一些常写的代码的简写,还能自定义变量:首选项 > 配置代码片段
最常用的:
- console.log
- React函数组件初始化
- React函数组件添加forwardRef
5. 其它软件
- Charles:抓包工具
- ApiFox: 网络接口调试
- Typora: markdown编辑器